Modern IT infrastructures are becoming more dynamic and resilient with the passing years. Containers, for example, have revolutionized the way IT organizations develop, deploy and manage applications.
While container management and orchestration seem to be the way to go nowadays, one of the key pain points is once we have the clusters and applications deployed, how do we guard our ever-growing ecosystem internally and externally?
Securing Kubernetes and cluster access management is complicated, but following the zero trust principles, you can ensure that only verified and authorized requests can have access to the information. As part of creating awareness around securing Kubernetes with zero trust principles, I recently gave a talk around this topic at Kubernetes Community Days Bengaluru 2023 that you can also watch. This blog post is based on my talk. Here, we will cover various aspects related to zero trust security and access management with Kubernetes with a practical application.
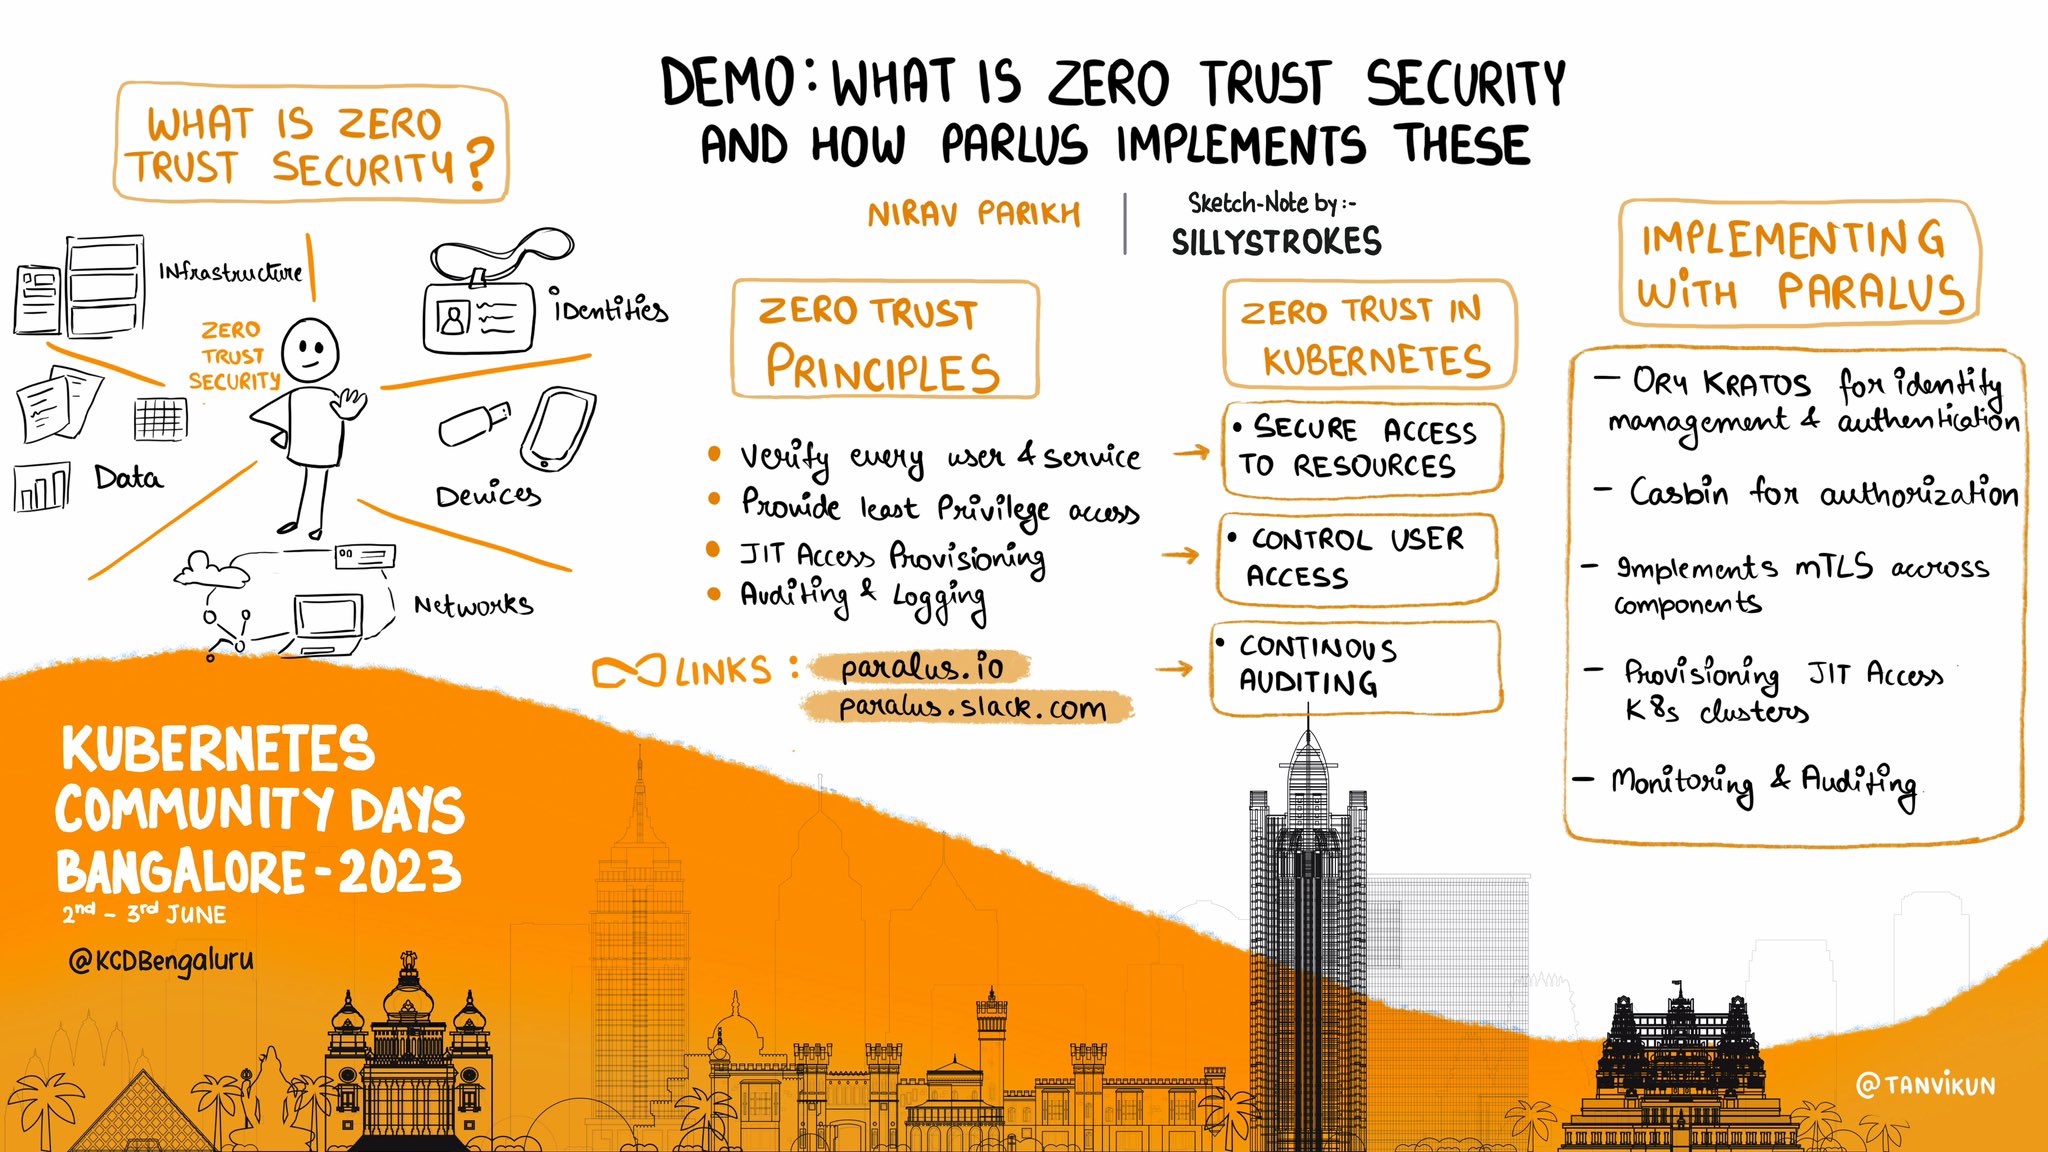
What is Zero Trust Security?
Zero trust is a security framework that requires strict identity verification and authentication for every user and device attempting to access an organization's resources, regardless of whether they are inside or outside the network perimeter. Based on authentication, authorization, and encryption technologies, the purpose of zero trust is to continuously validate the security configurations of your infrastructure and applications to ensure trust across an environment. This approach improves protection against potential security breaches and unauthorized access.
Zero trust security incorporates these basic principles:
- Continually verify and validate the identity of each user connecting to your organization.
- Regularly verify and validate each asset connecting to your organization including networks, systems, applications, and devices.
- Monitor and control access to each user, asset, and resource, ensuring that they are provided the least privilege access to accomplish a task.
- Provide Just-in-Time (JIT) access. So, when a user or service needs access, they can have it and once the task is completed, the access would be revoked.
- Continuously track and log all operations done on the system through a comprehensive monitoring process.
Let’s learn a bit more about advanced zero trust security principles in detail.
Authentication
Authentication is a process of verifying the identity of every process or registered users before enabling access to networks and systems. Kubernetes zero trust requires the authentication of every user and service account before enabling the execution of an API call.
This can be done using one of the following:
- Client certificates
- Bearer tokens
- OpenID Connect (OIDC) tokens
- HTTP basic authentication
- Authentication proxies
- Webhook token authentication
Authorization
Authorization is the process of granting or denying access to specific resources, services or actions based on the identity and permissions of a user or a system entity.
Kubernetes uses a modular and extensible architecture for authorization, allowing cluster administrators to choose from various authorization mechanisms based on their specific requirements
- Node Authorization (Node): This authorization mode is used to control API access based on the node's identity. Nodes are granted specific permissions to interact with the Kubernetes API accordingly.
- Webhook Mode (Webhook): Webhook authorization allows Kubernetes to delegate authorization decisions to external systems through HTTP callbacks.
- Role Based Access Control (RBAC): This method provides access authorization based on the user’s role within the organization (i.e., developer, security, admin, etc.).
Admission Control
Admission control is responsible for gatekeeping. Its dynamic nature validates if the request is allowed to be processed by the policies (can be business logic etc.).
Provisioning Just In Time Access
It means provisioning access to resources for users upon request and revoking the access once the said task/session is completed. For more details, you can read this blog on understanding just-in-time (JIT) access in Paralus.
Auditing & Logging
From a governance perspective, it is essential to keep a track of all the requests and their corresponding impact on the target system. This can be done by intercepting the Kubernetes API calls and logging them in your preferred database/logging system, inc.
How to implement Zero Trust Security using Paralus?
Paralus is a CNCF Sandbox Project. It is an open source tool that enables controlled & audited access to Kubernetes infrastructure. It comes with JIT service account creation and user-level credential management that can integrate with your RBAC and SSO.
How does Paralus implement Zero Trust Security?
Paralus uses Ory Kratos for identity management and authentication, and Casbin for authorization. As an additional security mechanism, Paralus implements mTLS across components where Paralus core acts as a certificate authority provider and validates all requests coming in from various services and apps. You can read the documentation to learn more about Paralus’ architecture.
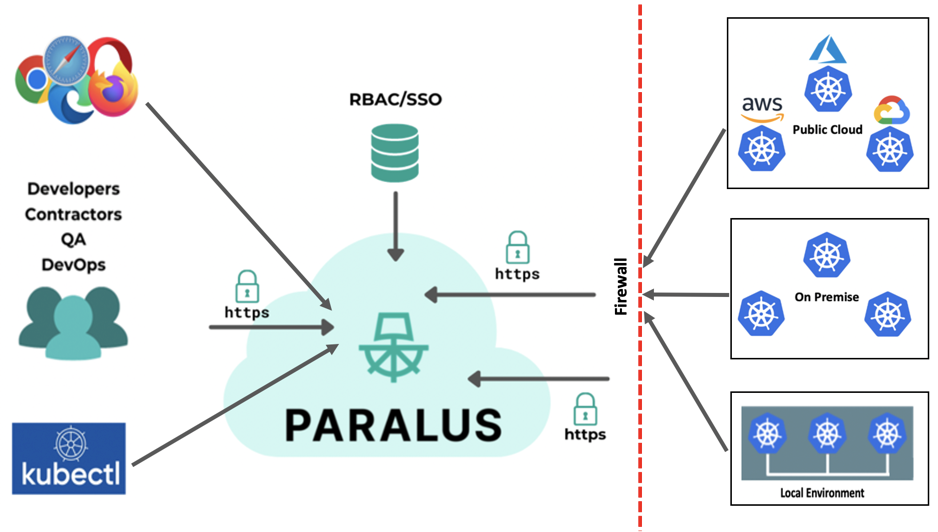
Paralus acts as a proxy and intercepts all requests coming into the target Kubernetes clusters. Once the requests are authenticated and authorized, Paralus creates a service account with the necessary Kubernetes RBAC. It enables JIT access and also keeps a record of all incoming requests to achieve auditing across tens of clusters from a single place.
As part of KCD Bengaluru, I gave a demonstration on how Paralus can be installed and a few playbook scenarios that are common across organizations using Kubernetes. I also covered how Paralus can be used to your benefit in such cases.
Installing Paralus
In this tutorial, we will install Paralus on a kind cluster. If you don’t already have one setup, you can follow this installation guide for kind and follow these steps for Paralus.
Once Paralus is installed, we can import existing clusters that can be accessed from Paralus.
Let’s see how Paralus implements mTLS across components. For every peer, user, relay-agent, a certificate signing request will be created which will be signed by Paralus certificate authority and used for verification on every request.
Log from relay-server
{"level": "info", "ts": "2023-06-26708:05:46.1382", "caller": "relay/relay.go:385", "msg": "Relay Server::peer certificate: -----BEGIN CERTIFICATE-----MIICETCCADagAWIBAgIRANQYS6T]DQON3VVC/CWCgYIKoZ1Z]-----END CERTIFICATE-----"}

{"level": "info", "ts" :"2023-66-26T08:05:46.1482", "caller": "relay/relay.go:497", "msg": "Relay Server: :user certificate: -----BEGIN CERTIFICATE-----MIICSJCCATGOAWIBAGIRAKOLUOBQAfZa/XVPLISHTNOWCGYIKOZIZJOEAWT-----END CERTIFICATE-----"}

{"level": "info", "ts": "2023-66-26T08:05:46.1552", "caller": "relay/relay.go: 594", "msg": "Relay Server: :connector certificate: -----BEGIN CERTIFICATE-----HIICQZCCAQGAWIBAQIQQ2UWLUV3G2LKTI1UO13g20AKBggqhkOPQ-----END CERTIFICATE-----"}
Log from relay-agent (core-connector certificate)
{"level": "info", "ts": "2023-06-26710:54:13.371Z", "caller": "agent/agent.go:407", "msg" : "Relay Agent::certificate: -----BEGIN CERTIFICATE-----MIICBTCCAaqgAWIBAQIRANTDYZVLAGEQh3mRUMDKS+kwCgYIKOZIZJOEAWIWFZEMM-----END CERTIFICATE-----"}
$ openssl x509 -in agent.crt -text -noout


Certificate:
Data:
Version: 3 (0x2)
serial Number
d4:db:63:3b:cb:76:01: :79:91:52:67:64:4bze9
signature Algorithm: ecdsa-with-SHA256
Issuer: C = USA, ST = California, L = Sunnyvale, 0 = Paralus, OU = Paralus Sentry, CN = paralus-core-relay

validity
Not Before Jun 26 10:54:13 2023 GMT
Not After Jun 23 10:54:13 2033 GMT

Subject: OU = chtf6gqc6pouns3fqcng, CN = cicmrq2c6pouns3fqdeg
Subject Public Key Info
Public Key Algorithm: id-ecPublicKey
Public-Key: (256 bit)
pub:

4:68:cd:72:ad:7e:43:3f1ab:3b:0
0:6C:93:2d:d6:5e:37:b0:74:82:10: a4: e3:bd:b2:
C:95:95
ASN1 OID: prime256v1
NIST CURVE: P-256
X509v3 extension:
X509v3 Key Usage: critical
Digital Signature, Key Encipherment
X509v3 Extended Key Usage:
TLS Web Client Authentication
X509v3 Authority Key Identifier
key1d:06:C2:39:98:FF:B6:06:A1:

:69:98:FE:82:95:39:DB:A8:0B:E8

Signature Algorithm: ecdsa-with-SHA256
30:46:02:21:00: fc: f3:92:38:f3:7:64:44:5d:95:b9:02:ac:
Scenarios where Paralus is Helpful
Let’s run through a few scenarios where Paralus proved to be beneficial.
Scenario 1: Someone new joins our organization as a developer. We would like to onboard them onto our AWS project and give them access to all AWS clusters.
Note: In this demo, we will use local users. You can also configure Paralus to use your organization’s identity provider as a single sign-on application for a more seamless experience.
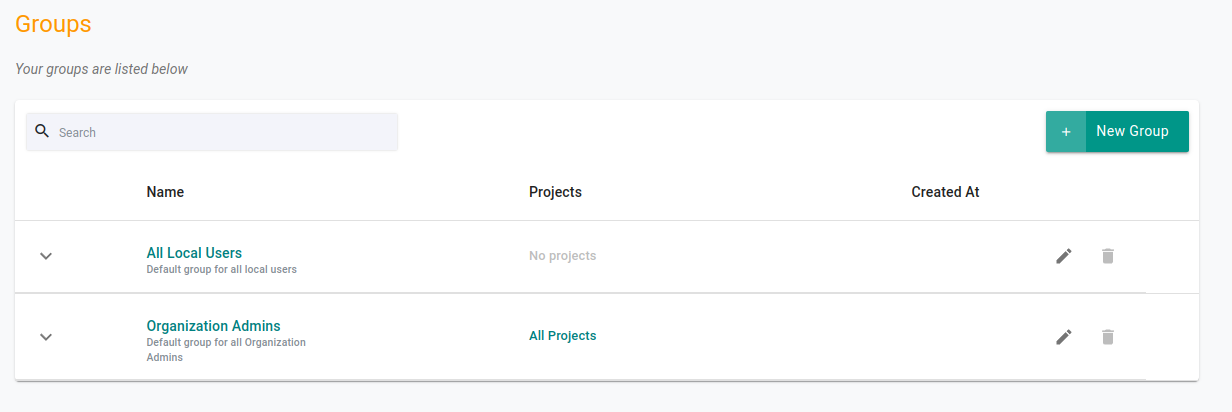
Create a new group called “AWS Project Members”, which provides its members cluster admin access to all clusters under the AWS project. You can learn more about how to work with groups in Paralus.
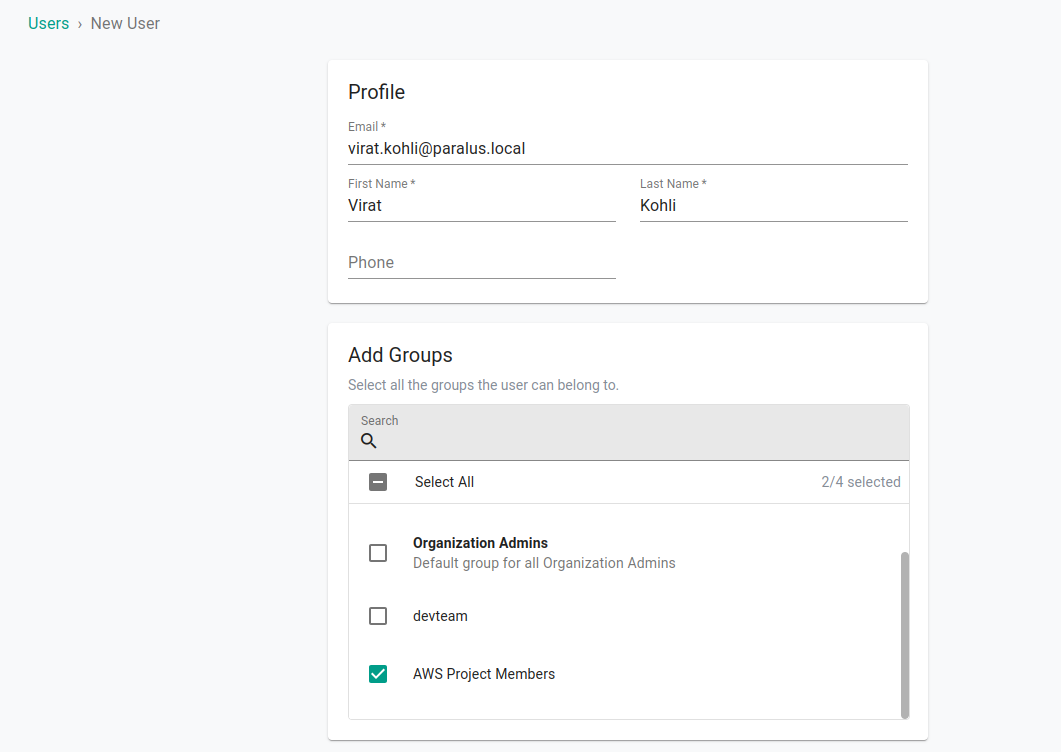
Now, we will be creating a user in Paralus and making them a part of the “AWS Project Members” group.
That’s it. New users will now be able to access all clusters under the AWS project and execute kubectl commands against it.
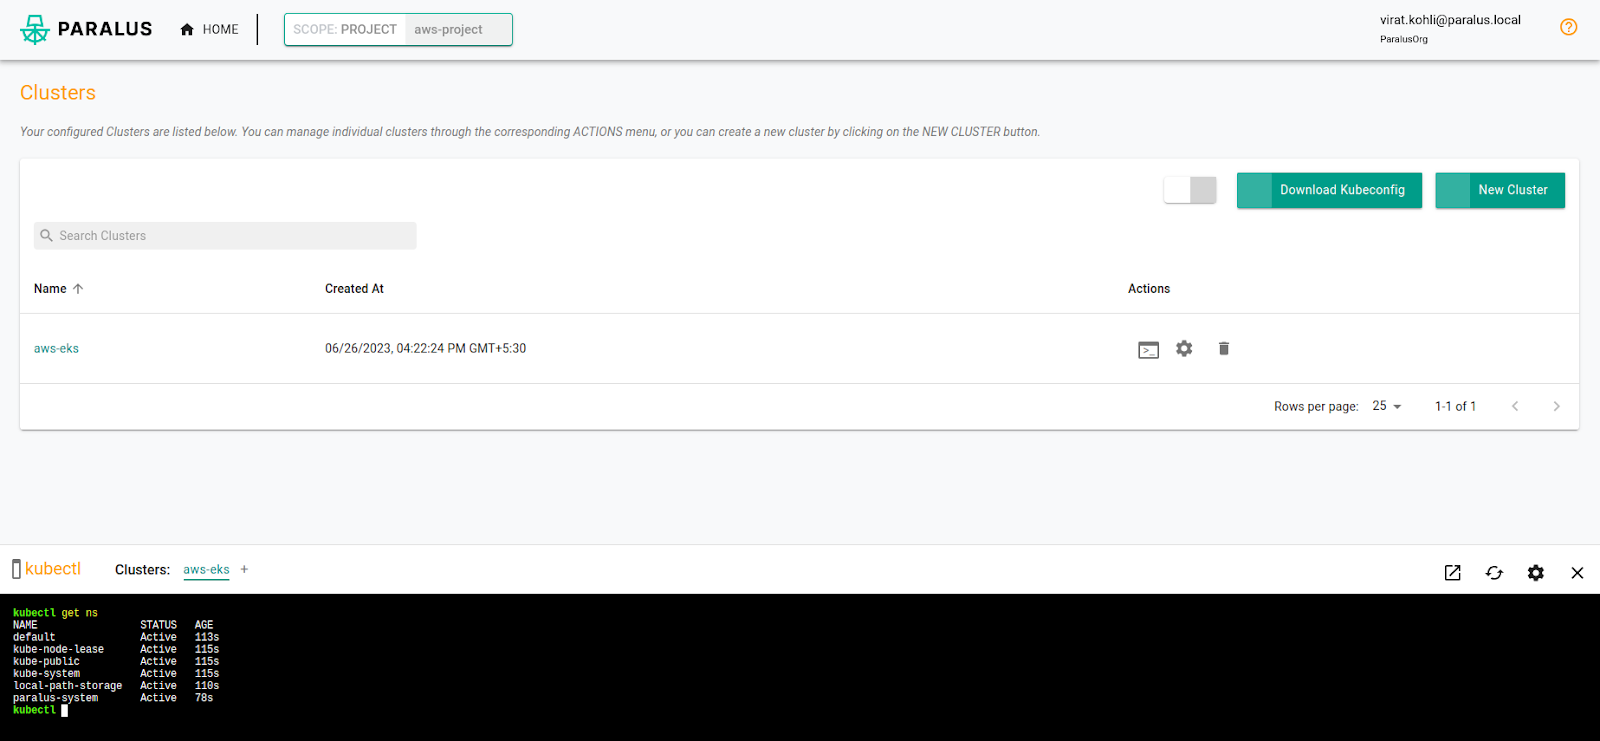
As part of this scenario, we saw that a user once authenticated by the organization and based on the authorization policy, (in this case project roles associated with groups a user is a member of) is able to gain access to clusters and start executing kubectl commands.
Let’s verify just-in-time access provisioning. In your target cluster, you can check that a service account for the user just got created after the user executed their first command against it:
$ kubectl get sa -n paralus-system | grep “user”

virat-46-kohli-64-paralus-46local                        1                   5m55s
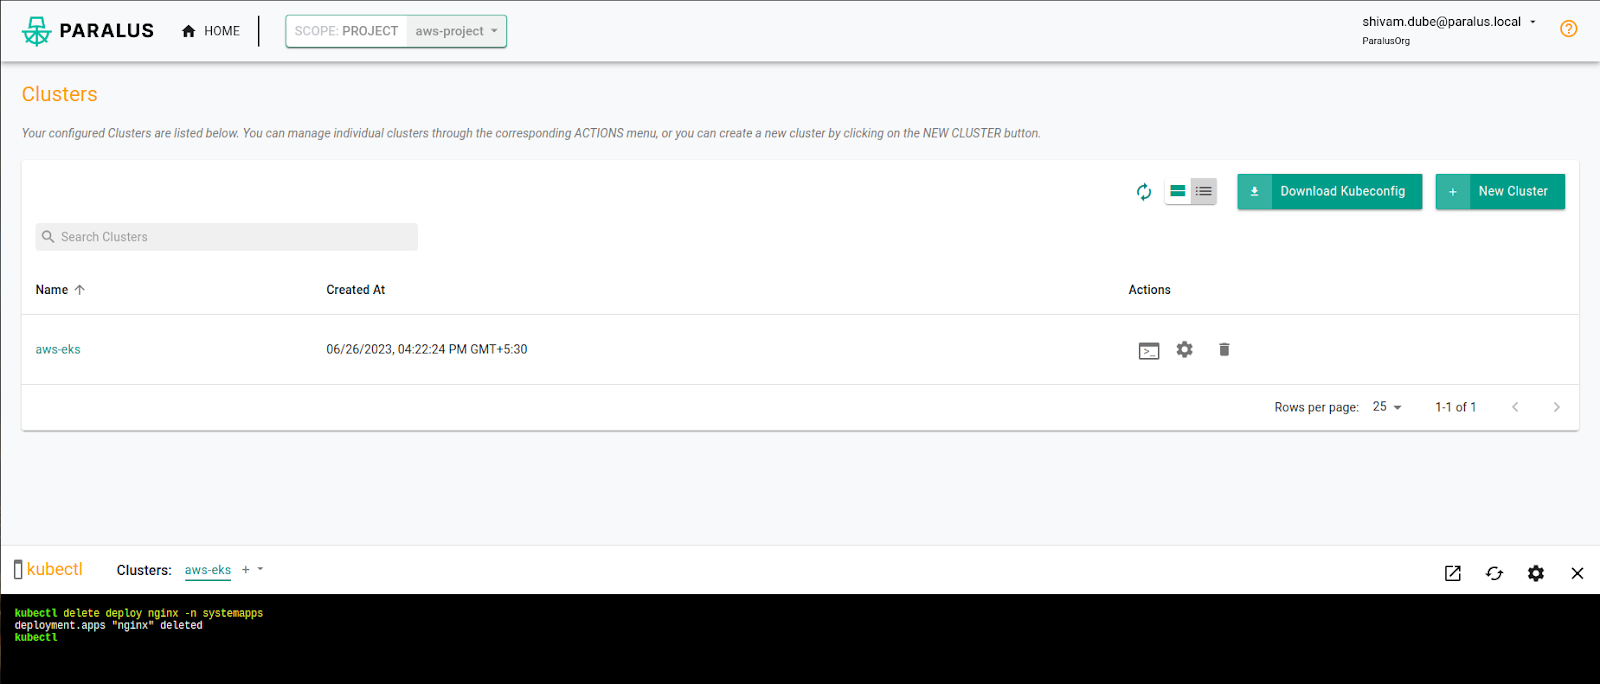
Scenario 2: Let’s say a trainee was accidentally given cluster admin access and is able to delete critical deployments running as part of his exploration. The project manager wants to revoke the access immediately and schedule a meeting to go over do’s and don'ts before assigning him read-only access.
Whoops, trainee Shivam deleted a critical Nginx deployment by mistake.
Virat, the project manager, wonders what happened and checks the audit logs.
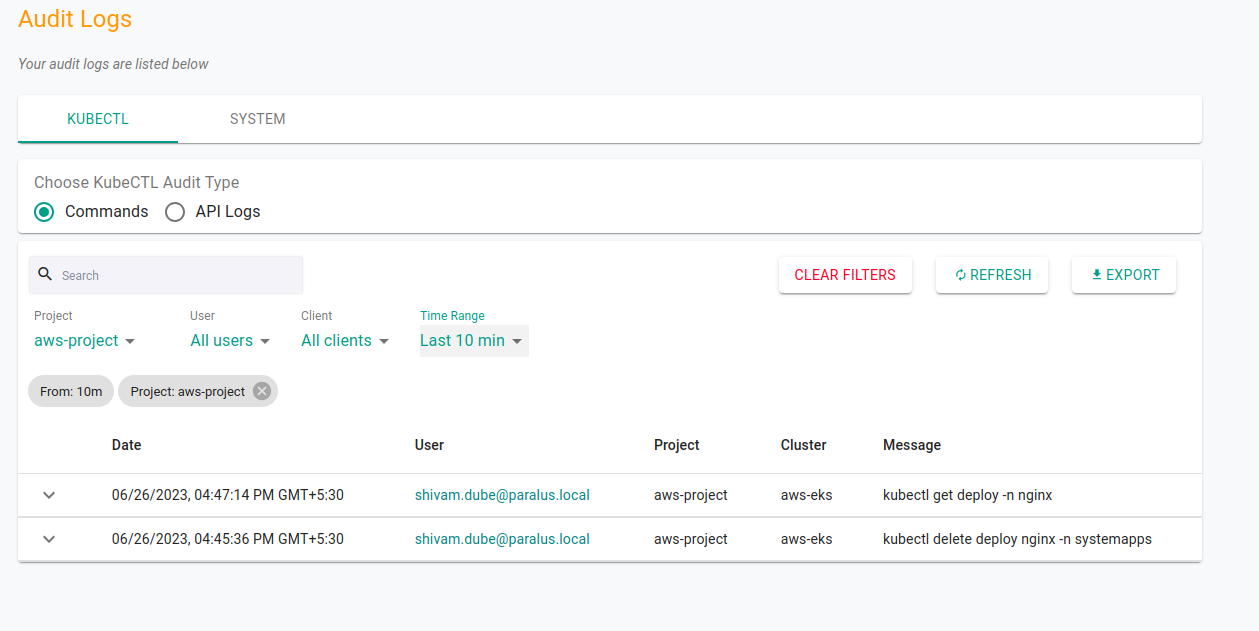
Upon knowing it was Shivam who accidentally deleted it, Virat immediately decides to revoke his access and schedule a meeting on do’s and don'ts before adding him to the trainee group where he ideally should have been added.
Now Shivam is unable to access any of the clusters.

Let’s verify whether his access is actually removed from the target cluster.
$ kubectl get sa -n paralus-system

NAME                                   SECRETS                         AGE
admin-64paralus-46local                  1                             58m
default                                  1                             59m
system-sa                                1                             59m
virat-46kohli-64paralus-46local          1                             58m
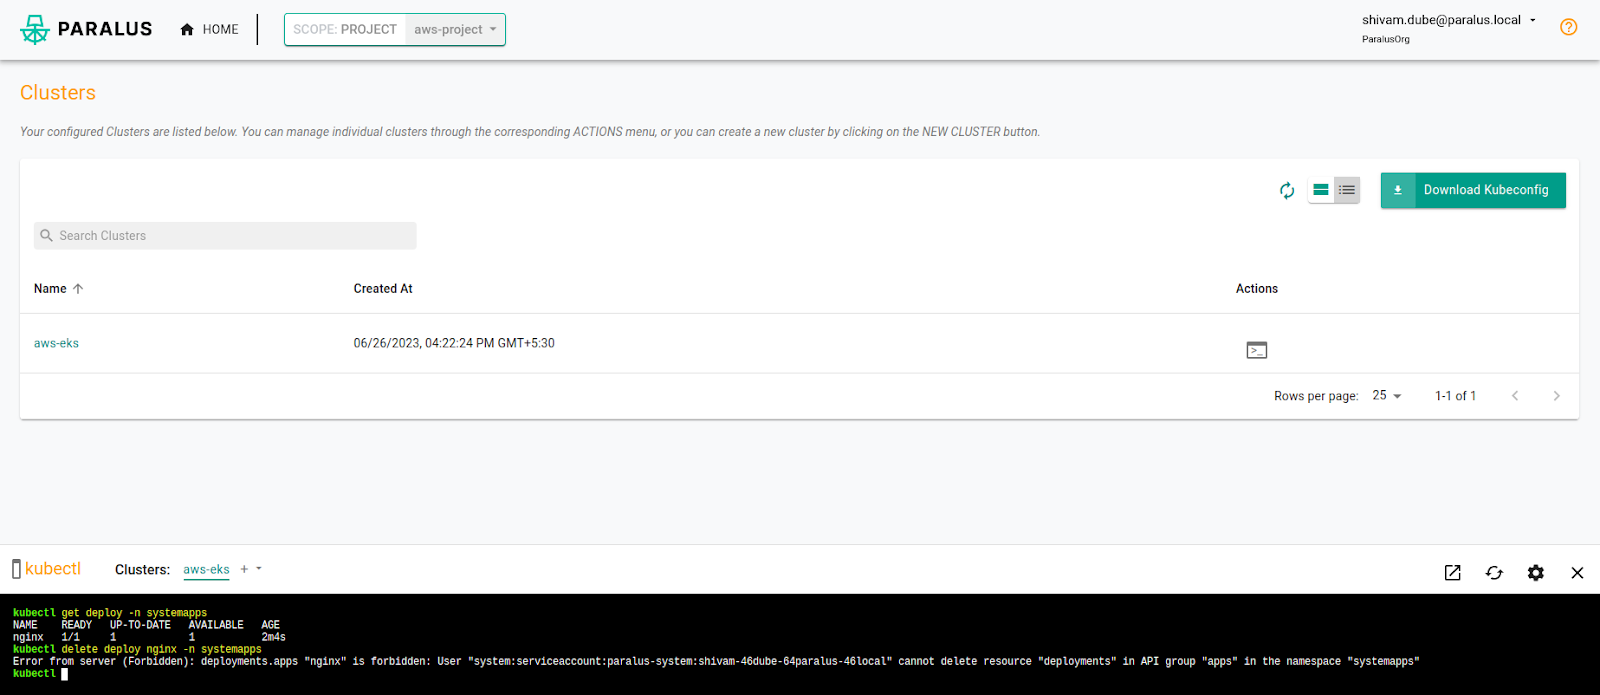
Once added back to the trainee group, he’s able to view all the system resources for restricted namespaces and continue exploring without modifying/deleting anything.


Now, Shivam can view the resources but cannot modify/delete anything.
Conclusion
Zero trust access is a crucial security framework in today's evolving threat landscape. It offers a more robust and proactive approach to cybersecurity, providing organizations with the ability to defend against a wide range of threats and protect sensitive data, no matter where their employees or resources are located. Embracing zero trust access principles is essential for staying ahead in the ongoing battle against cyber threats. In this article, we learned what zero trust security is, and a few basic principles. Further, we explored in depth the various zero trust principles like “authentication”, “authorization”, “just-in-time-access”, "admission control” and the importance of “auditing”. We also talked about how Paralus implements these various principles and also saw a demo of how Paralus can be installed and a few scenarios to verify the above in action.
I hope you found this post informative and engaging. For more posts like this one, do subscribe to our newsletter for a weekly dose of cloud native. I’d love to hear your thoughts on this post, let’s connect and start a conversation on Twitter or LinkedIn.

